Planting potatoes - there are a lot of ways, as well as growing technologies. What is the best way to plant potatoes? Under cardboard or mulch? Or maybe under a mound of mulch? Or double rows under one crest? I will introduce you to some ways, and you decide which one to use. After reading the article, you will learn the pros and cons of various methods of landing, you can choose the most suitable for yourself.
Planting potatoes for cardboard and mulch

Applying this method of landing once - it will be difficult for you to return to the old methods!
This method includes only four components:
- cardboard,
- knife,
- sprouted potatoes
- organic matter such as hay, straw or leaves.
Inspired by the principles of this growing technology, you can get a crop with virtually no tools.
Planting potatoes. Ideally, it should start in the spring, a month after the snow has melted, the earth has warmed up, but no later than the temperature of the soil at a depth of 10 centimeters will exceed 12 ° C. For planting from pre-selected seed tubers, it is necessary to choose potatoes that are not damaged by disease, pests or mechanically, weighing from 50 to 120 g. It is this size of seed potatoes that is considered optimal for planting.
Take sheets of cardboard - the larger they are in size, the better. It is best to stock up in advance with large sheets that are thrown away by furniture or household appliances stores. Or stock up on smaller sheets. They can be found near, for example, grocery stores. But then they will need to be prepared more. Remove from the cardboard everything that should not be in the garden (packing tape, staples, scotch tape).
Choose a place where you plan to plant potatoes. If some vegetation grows there (for example, grass, dandelions) there is no need to weed it out. Spread the sheets of cardboard, and in order to straighten them, jump or dance on their surface for several minutes. Under them, grass, weeds will be closed from sunlight, sooner or later they will die.

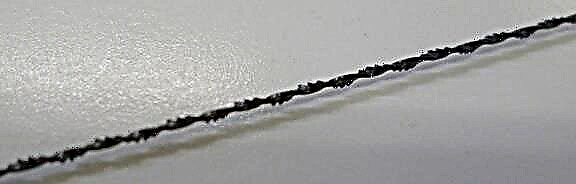
You should make sure that your pieces of cardboard overlap significantly by at least 30 cm (see photo). This ensures that weeds do not break between the sheets of cardboard to the sunlight.
Take a knife, make X-shaped holes two times larger than seed tubers. Slice cut at a distance of 25-30 cm from each other.

Place seed potatoes in each of these holes. It should lie directly on the ground or on top of the grass. Make sure that at least one germinated sprout comes out of the hole. Then cover the cardboard cut slightly. Ideally, if the tubers are slightly hidden by the coating. This is so that only the sprouts could break through to the light, and not the grass.
Then you should cover all the sheets of cardboard with a thick layer (15-20 cm) of hay or straw. As soon as the potato sprouts break through the mulch towards the sunlight, reach a height of 10-15 cm, one should still pour hay or straw on top, since by this time the first layer of mulch will beat in the rain, it will become much thinner. Coating the tubers planted under the cardboard with a second mulching layer will actually replace the earthing up.
Please note: if the soil turned out to be dry before planting and no rain is expected, it is recommended to shed the area well before laying cardboard sheets.
What is better to use - hay or straw? Hay containing nutrients, decomposing, will act as fertilizer. The downside to using hay is this: it can contain weed seeds that can germinate in a humid environment. Straw is free of any weed seeds, but poor in nutrients. She will not act as an organic fertilizer. Hay blocks sunlight more efficiently, so straw should be poured over cardboard with a thick layer. Conclusion: choose for yourself - use what you have!
Potato planting care. Potatoes planted under cardboard essentially require almost no maintenance. If the mulching layer of straw or hay is thick enough, theoretically you can go on vacation for the next two to three months, and return only to harvest.
But you may still have to visit the site for adding mulch so that the growing tubers are not exposed to sunlight.
The advantages of the method of planting potatoes under cardboard or mulch. Your site will not need weeding: cardboard, mulch help block the sun's rays: weeds will not break through to the light. Instead of removing weeds, you leave it. She becomes the first layer of compost. The cardboard is biodegradable, hay straw decomposes in a season or two. They also nourish your soil with organic matter.
Watering will not be needed: cardboard retains moisture, delays evaporation. An exception is a dry summer, but the need for watering when using such a coating is minimal.
The soil below the cardboard does not compact, it is loose, it does not need digging. In addition, lifting a sheet of cardboard, you will see a lot of earthworms - they will help make the land more fertile, improve its structure.
Harvesting potatoes. When the tops begin to turn yellow, dry out, the time has come to harvest. Spread the mulch, lift the cardboard ... and voila!

Potato! No need to get your hands dirty - the whole crop is simply on top of the soil, waiting for you to collect it. Why is this happening? Because potatoes should not be in the soil. It just needs to be in contact with the soil, so that its root system has access to water and nutrients. Potatoes are traditionally buried so that the tubers do not turn green, since such tubers are poisonous and not suitable for eating. But, using this technology, we isolate the potatoes from the access of light, while not compromising the quality of the crop.
Have you failed using this method? Is the crop small? Is the potato too small? Let's look at the possible reasons for this.
Whether the method is successful or not depends on what goals you set for yourself when you started using this method.
The first goal is to grow a good harvest. But you have used traditional methods for many years. You dug up or plowed the soil, hiding the upper fertile layer deeper, thereby depleting the soil. Or you may have poor soil quality, it is too compact, or you have heavy clay soil. One should not expect a good harvest on this basis. You may be disappointed with your results if your goal is to immediately get a good harvest.
The second goal is to improve the structure and quality of the soil. Now, if you set yourself such a task, then, I assure you, you will not be disappointed. The quality and soil fertility with this technology will improve every year. In 2-3 years, your goal - to grow a good harvest - will be achieved!
The cardboard method may require your more active participation (search for cardboard, hay or straw), although subsequently the labor costs will be minimal without weeding or watering. For gardeners who love simplicity, low maintenance, this is more than an easy way to grow potatoes. Most importantly, the soil is protected from erosion, its structure is improving. This method supports the life of microorganisms, so necessary to increase the fertility of the earth.
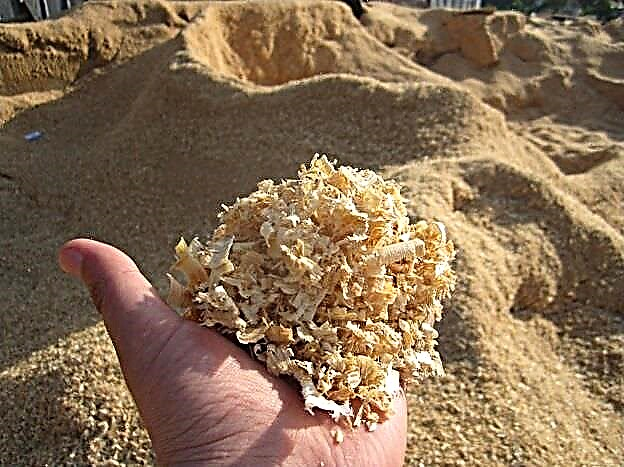
This is also a great method for weed control: instead of removing unwanted plants manually, you can just drown them out by covering the ground with cardboard or organic mulch (hay, straw, sawdust, leaves).
In addition, it is known that the favorable temperature for growing potatoes is about 20 ° C. In most areas of the Krasnodar Territory in summer, soil temperature reaches 50 ° C. Under such conditions, the potato bushes feel depressed - they "have no time for fat, I would be alive." Naturally, in such a heat, any growing technology can fail if one of the main factors of plant development is not provided - comfortable temperature.
Imagine that wet cardboard plus a 10-15 cm layer of organic mulch (straw) under the scorching heat lowers the soil temperature by 25-30 degrees !!! This is true, check. Covering the soil with cardboard with mulch, you can really count on a good result. Indeed, in addition to lowering the temperature, the mulching layer still retains moisture. Only two of these factors are already able to increase productivity.
This method involves manual labor, which means it is intended for gardeners, gardeners with small areas.
Concluding the story about one of the technologies for growing potatoes, I want to note that each operation brings its result to the general piggy bank. Perhaps you will not use all the operations in your garden, but only part of them. But still, now, having a general idea of how a high yield is formed, you will find ways to increase productivity.
Planting potatoes under a mulch mound
Planting in holes, hilling are time-tested traditional methods of growing potatoes. But if you do not want to delve into the ground, but want to collect young potatoes without getting your hands dirty, then you should try to grow it under a mulch mound.
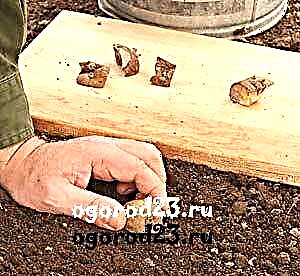
- So, the first step is the preparation of seed potatoes.
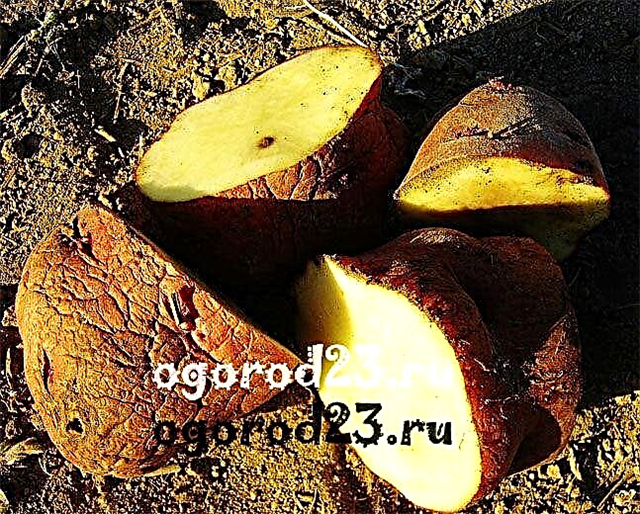
Cut the tuber into several parts (see photo). It is necessary that the eyes were on each part of the tuber. These are growth points where new stems will appear. Pieces should not be too big. Oddly enough, the eyes on smaller pieces begin to sprout faster, they develop stronger roots, i.e. they do not live off seed stocks. Do not try to leave many eyes in one piece. From each sprout several stems. If there are a lot of them, then they will fight with each other for the sun, nutrients. Let the sliced pieces dry within 24 hours. You can pre-dip each piece into ash. This will dry the slice, help it resist disease.
- Step two - soil preparation.
Using this technology, you will not need to dig holes or trenches. You just need to smooth out with a spatula or scoop the places where you are going to put the prepared pieces of seed potatoes. Take a piece, hold it firmly to the ground. Make sure the peephole is looking up (see photo).
- Step Three - Create a mound. Spread mulch with mound 15-20 cm high above the potatoes.
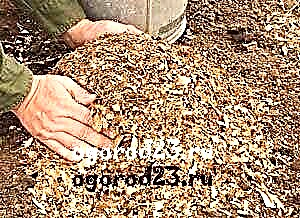
Mulch can be last year's leaves or straw. For example, oak leaves are great for this purpose. Hay is also not bad, but hay can contain weed seeds, which means that you will have to periodically pull them out of the hills. Sawdust can be used as mulch. Then water the mounds - a wet mulch will hold a cone shape well. But water the first time carefully so as not to destroy the mounds. So that the wind does not blow off the mulch, you can sprinkle it with earth. After a few days, the potatoes will take root. Keep the mounds moist at all times. When the shoots break through the mulch, you can feed the potatoes. Watch the height of the hills. Add mulch when you notice that it has settled.
- Step Four - Harvesting. The most enjoyable component of this method is that you can choose to eat young potatoes without interfering with the growth of the plant.
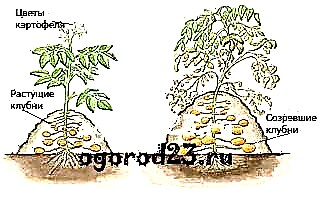
If your goal is to try young potatoes immediately after flowering (see the picture on the left), then simply rake the mulch carefully, pinch off the largest young tubers from the ends of the stolons with your fingers. Choose 2-3 larger tubers, and leave the rest - let them still grow. Continue to water the potatoes all season. And if you want the crop to ripen faster, stop watering the bushes after flowering has ended.


The advantages of this method - no need to dig up the soil before planting and dig up potatoes after it has ripened. A thick layer of mulch retains moisture, inhibits the growth of weeds. Cons - in this way it is hardly possible to plant large areas. There should be a lot of mulching material, and this is a big problem for gardeners.
The method of planting potatoes in twin rows under one ridge
Dear summer residents, remember! Autumn-winter formation of ridges from north to south gives better illumination of the bushes.
Growing potatoes in double rows under one ridge provides a significant increase in yield due to:
- better lighting, better moisture retention, raising water through undisturbed capillaries from the depths of the earth;
- repeated mulching - the soil is loose, no crust forms after rain;
- greater safety of plants from frost, their rapid recovery after frost;
- the exclusion of many weeds, hills of both spring and summer landings;
- reduced flooding after heavy rains.
The experiments confirm that in the Kuban, southern Russia, the highest potato yields are obtained at row spacings of 55 cm, the distance between rows of plants is 27 cm, that is, the area of nutrition of the bush is 1485 square meters. see. And with row spacing of 60 cm in paired (double) rows, the intervals between tuber lobes should be 25 cm (1485: 60).

Due to the high cost of mineral fertilizers, their detrimental effect on soil life, the quality of tubers, use the available organic matter before planting more. Then you can raise the fertility of the earth, increase yields even for many years, growing potatoes in one place.
It is proved that the February and March plantings are 40-50% more productive than the April ones, since the latter get a little moisture, but too much heat.
Long-term germination of seed potato tubers in the light is very beneficial. This increases the yield, accelerates ripening, allows you to get away from the heat.
Processing (5-7-minute bathing) of tubers with two eyes or sprouts before planting an clay-ash mash (50 l of water - 1 bucket of yellow clay, 1/2 bucket of ash) gives root and sprout growth up to 2 cm per day. This speeds up seedlings, provides power to the root system.
A random fragment of seed potato sprouts reduces yield by 20%. Shorten the sprouts obtained in the dark to 5-6 cm.
Observations showed that laying cardboard between double rows (90 cm), repeated mulching with grass, sawdust prevents the formation of crust after rains, preserves soil structure, moisture, inhibits weed growth, creates good conditions for propagation of earthworms, ensures a decrease in soil temperature at a level tuber formation of 10 degrees or more, contributing to the growth of tubers even in 40-degree heat.
The detrimental effect of heat is reduced by whitewashing plants with a solution of white clay (500-600 g / 10 l of water) in combination with micronutrients.
Removing the buds increases the yield up to 50%.
Three foliar top dressings of “Biomiks-3” (2 tablets / 10 l of water) along with whitewash and poisons against the Colorado potato beetle, late blight yield twice the yield of tubers of spring-summer plantings of potatoes.
So, this method includes: a combination of many months of germination in the light, bathing a share of tubers in an clay-ash mash, planting them early on a mixture of organic fertilizers, multiple mulching, picking buds, foliar dressing along with whitewashing poisons against pests and diseases, cleaning when yellowed by 25-30% tops. This allows you to collect a decent crop of tubers, to avoid degeneration even after spring frosts and summer heat.
There are many ways to plant potatoes. I will be very grateful if you share your knowledge or observations.