Replacing interior doors - the process is not as labor-intensive and complicated as it seems. You can fill in a double or single opening yourself without the help of a specialist. Of course, you will not save time, but save money and gain new skills when repairing an apartment or a house.
How to install an interior door: in this article we will tell you how to choose a good door leaf, what the block consists of to fill the opening and how to mount it.
Opening measurement
Mistake at the stage of measuring the doorway is unacceptable: if you purchase a large system, you can’t insert it, smaller ones you won’t be able to fix it well.
The doorway is best measured after dismantling the old door when access to the exposed wall. Thus, you can assess the situation and make the right measurements. It's easy to remove them: take a tape measure and determine the height and width of the entrance along the wall in the narrowest place (relevant for buildings where the vertical structure is poorly observed). With this data, go to the store behind a brand new door.

Production of the product according to individual sizes is not required: in houses with apartments, builders initially lay standard openings, and fillings for them are always on open sale.
Interior doors in a private wooden house may differ from standard ones, then you will have to order new ones and wait for their manufacture.
Door selection
The first thing you should pay attention to when choosing a canvas and box is the material of their manufacture.
- Fiberboard is used for the production of budget doors and frames. The material does not protect the room from extraneous sounds, absorbs moisture, filling will lead in the very first off-season. It is strongly not recommended to choose a box from fiberboard, it quickly deforms even under the weight of the door.
- MDF is a more reliable material with increased density, average in the ratio of price and quality. It is strong enough to withstand mechanical stress, does not absorb moisture, muffles sounds and lasts a long time.

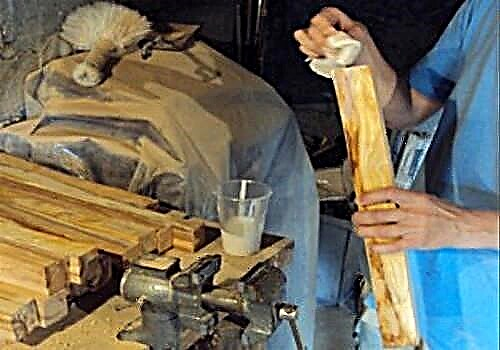
- Solid wood is ideal for the manufacture and installation of boxes. It will not lead from humidity, it will withstand the weight of any door. Laminated wood is additionally lined, untreated timber is not inferior to laminated timber in operational qualities, but it will have to be painted or decorated.


The ideal option is to purchase a box and canvas from one material. Do not give preference to wood fiberboard, the doors from it are short-lived, they are installed at construction sites so that new owners can replace them with permanent ones from more durable materials. Ideally, it is worth acquiring a solid array as a door filling, to reduce the cost, the canvas can be replaced with MDF, which is also a solid raw material for the manufacture of door, cheaper frames.
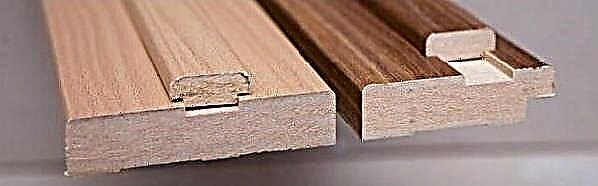
Additional strips and platbands can be made of fiberboard, wood or MDF. They do not carry loads, they only adorn gaps and mask connections.
Double doors are often chosen for large rooms and halls, single-door units are installed in bedrooms and kitchens. In any case, the size of the box and the number of paintings are determined by the size of the opening.
Step-by-step installation instructions from scratch
Installing interior doors with your own hands will not take much time, just stock up with the right tool, purchase the necessary material and you can get to work. Follow the detailed step-by-step instructions and you are guaranteed success.
This plan is valid for the installation of swing doors, sliding mounted slightly differently, but in a similar way.
Step 1: prepare the tool and material
To install the interior door you will need:
- Drill or perforator;
- Drills for 3 and 4 mm on wood;
- Drills 4 and 6 mm for concrete;
- Saw;
- Screwdriver;
- Wood screws;
- Level / plumb;
- Polyurethane foam;
- Roulette;
- Pencil.

In addition, a door unit must be purchased in advance.
Step 2: determine the tactics of action
Installation of wooden doors is carried out according to the standard scheme presented in the photo.

- Door frame;
- Door leaf;
- Nail / screw;
- Polyurethane foam.
First, collect the box, then insert it into the opening and hang the door.
Step 3: collect the box
There are 2 options for assembling the box under the canvas.
- Connecting parts at an angle of 450. Cutting the slats is a delicate job, but the result will pay off: the connection is reliable and visually almost imperceptible. For cutting, it is better to use an electric, well-ground tool, from a hand saw there are often notches and chips.

- Right angle 900. Such a connection is less reliable, but simple in execution. To prepare the parts, it is necessary to remove part of the length from the side racks of the box and the lintel.


To understand whether the excess parts of the tree are cut correctly, assemble the box on the floor like a mosaic: everything should fit together perfectly. Then we fix the strips on the screws from the side of the wall.
For the threshold, you also need to determine the place by attaching a canvas to the box collected along the upper part. Stand back 2.5 mm from it and take a risk. On this label attach the lower bar - the nut.
Step 4: marking under the loops
At the stage of assembly of the box, it is worth identifying the attachment points of the loops. To do this, measure 20-25 cm from the top and bottom on a side stand, attach loops and make risks with a knife or pencil. Screw the product with screws, thereby determining the future location of the loop, which will facilitate its fastening. Now insert the canvas, measure the gaps to the side faces and take risks on the canvas. In the same way, make several fasteners so as not to lose their location later.

Remove the screws and the loop, they will need to be fastened after installing the box in the opening.
The box is ready for installation. A more detailed process is demonstrated by the author of the video.
Step 5: installing the box
Do-it-yourself door installation now suits, and it begins with the assembly of the assembled box. To do this, put the structure on the threshold and align the vertical. Use a plumb line and level for reconciliation. To prevent the box from falling during verification, fix it with spacers or temporary wedges made of wood scraps.

Now you can check the canvas: will it open or not. To do this, insert it into the installed box, focusing on a flat wall. If the opening does not occur or is not fully realized, you may need to adjust the spacers and adjust the position of the strut and cross bars.
If you managed to install everything correctly and the canvas fits well, you can fix the box. How to do it:
- Wedges are driven in on the sides of the upper cross member, then over its fastening to the uprights;
- They drive wedges along the entire height of the opening, constantly checking the evenness of the installation and the absence of displacements in any plane.
Step 6: secure hold
The delivered and verified box must be finally fixed so that it can take on the canvas. There are 2 solutions:
- Screw the box to the side walls on the screws. This is a reliable method, for its implementation a few screws or wood screws are enough. Choose fastening places inconspicuous, mainly use the areas under the door hinges and under the lock plate. Take the boot on concrete and make a hole for the screw. Now fasten the fasteners so that his hat does not remain above the plane of the tree. If this quantity of fasteners is not enough, you can drill through holes in other places and also plant self-tapping screws, the caps of which are covered with plugs to match the surface.
- The second way is to use countersunk plates. A feature of the method is the lack of need for drilling boxes and walls.
After that, fill the space between the opening and the duct with mounting foam 2/3 of the total thickness. To prevent the structure from squeezing out, install spacers inside the passage contour for the duration of the foam polymerization.

Step 7: fasten the loops
With the correct installation of interior doors, the hinges are attached only before directly hanging the canvas. Screw the parts for the box to the previously marked places, repeat the steps for the blade.
Step 8: hinge and cladding
The hardest part is behind, now you can hang the canvas and close the joints at the casing. How to install the interior door clearly tells the master in the video.
As you can see, it is quite possible to replace or install a new interior door yourself, observing a clear procedure. The technology is described in detail and is given in the accompanying videos, therefore, understanding the issue is not difficult.