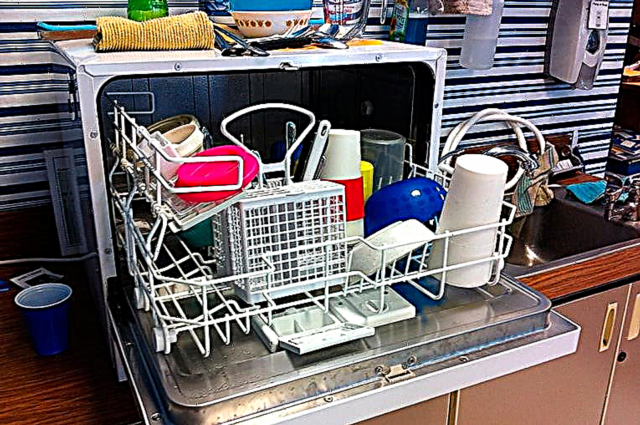
Installing any dishwasher is a simple matter, the main thing is to act carefully and slowly. And if you bought a desktop (portable) washing machine, then connecting it will be even easier and more convenient. After all, you do not have to climb the back panel of the device to connect all the necessary communications to it. In the article, we will tell you how to connect a desktop dishwasher yourself, and we will offer you step-by-step instructions.

What will be required for installation?
The first thing to do before installing the washing machine is to choose a suitable place for it in the kitchen. And in order to choose it correctly, it is necessary to consider the following:
- Water supply and discharge points, as well as the power supply network, should be located directly close to the future place of permanent deployment of the PMM.
- Ensure that during operation no other items (furniture, household appliances) interfere with free access to the machine (opening the door, loading dishes)
- The surface on which the equipment is installed must be level.

To install a desktop dishwasher, you need the following accessories:
- 3/4 inch threaded adapter;
- flow filter;
- siphon with tap (fitting);
- reel for sealing joints;
- clamps (clamps).
Of the tools you will need: an adjustable wrench (small), pliers, a screwdriver.
If pipes from an old dishwasher remain, re-use of them is unacceptable (even if they are intact and have no damage). Use only new accessories to connect.
Installation process
Installation of the PMM involves connecting it to the sewer, water supply and electricity supply. And in this case, the correct sequence of actions is of great importance. If you ignore this requirement, the procedure will take longer and may even have to be redone. How to act? We offer you step-by-step instructions below.
Step one: bring to the discharge point
The procedure for connecting to the sewer is not complicated. But you need to consider several nuances:
- The water siphon must have a side fitting for connecting the drain hose. If not, you will have to put in a suitable siphon.
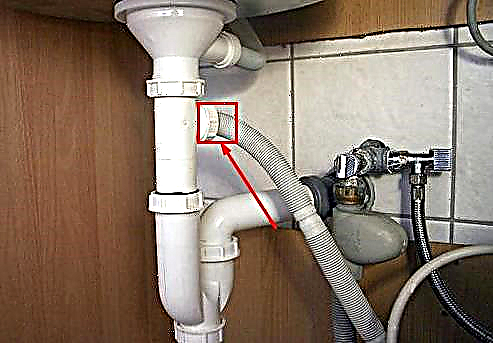
- If the dishwasher is installed below the level of the countertop, the drain pipe at the inflection point is raised to a height of not less than 75 cm.
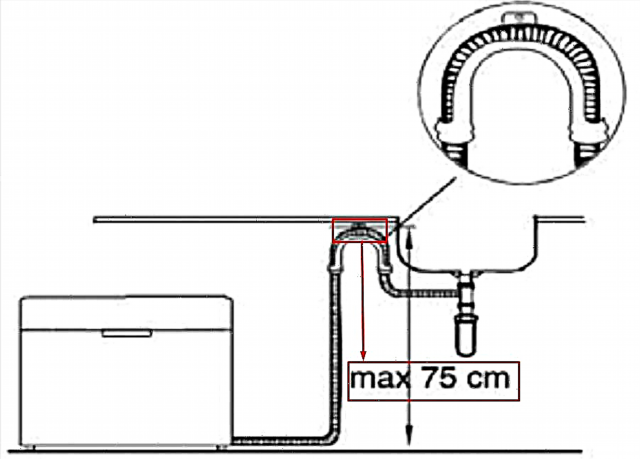


Make sure that the hose itself is never pinched or twisted. Otherwise, problems with water drainage cannot be avoided.
If these points are fulfilled, simply install the end of the drain hose into the fitting on the siphon. For reliability, it is better to fix the connection point with a collar so that with a strong pressure the hose does not break.

Step two: connect to the water supply
You can connect the equipment to both a cold water supply system and a hot one. But for our realities it is better to refuse the second option. Often in hot water contains a greater amount of mechanical impurities than in cold. Therefore, there is a risk that the machine will quickly fail, not having worked even half of its warranty period.
To connect the device to the water supply, proceed as follows:
- Turn off the water supply and drain the pipes.
- In cold water, disconnect the flexible eyeliner and remove the old waterproofing.
- In its place, install a straight through tee crane.
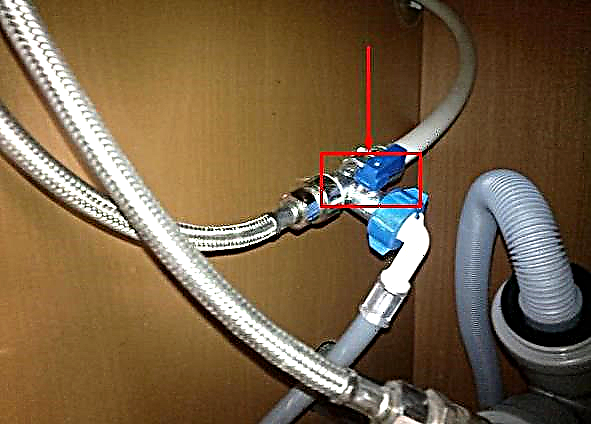
- Screw the inlet hose to one end of it (where there is no tap), and the plastic tube of the mixer to the other (which is with tap).
- Insulate all threaded joints with tape.

Wrap the bag in 10-15 layers around the connection. If the tape breaks, rewind it in the opposite direction.
Step three: connect to the mains
Any dishwasher is connected to a power source through a conventional 220-volt outlet. But it is important that its location relative to the connected device is as follows:
- To be close to the equipment, since the extension cord for supplying it is absolutely impossible to use.
- Located to the right or left of the device, but not behind it.
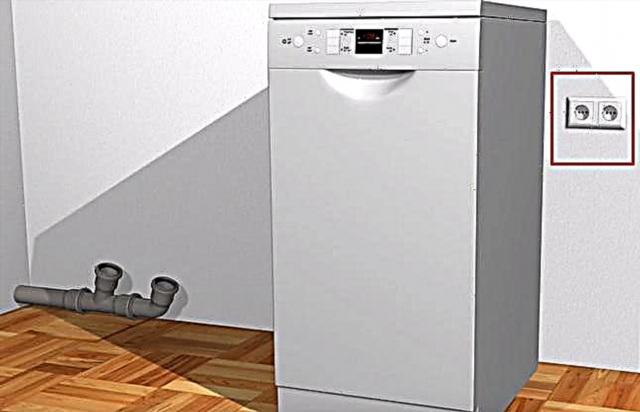

It is also impossible to connect the PMM and other household appliances to one outlet.
If all the rules and recommendations for connection are met, it remains to run the dishwasher in test mode to check the operability of the entire system.
Conclusion
Mounting a desktop PMM is no different from installing any other washing machine. If you follow simple rules, the procedure will be relatively quick and without much effort. But before starting work, it is better to read the instructions for the device, since each model can have its own nuances of connecting to communications.
In conclusion, we suggest you watch some useful videos on installing PMM below: